In this section I will detail the DC8PAT QO100 station which I am operating since Sept 2019.
Find below two talks I held about QO100 during the HAM Radio 2020 (in German, auf Deutsch) and during the Virtual Maker Faire 2020 (in English). It gives a complete overview of station design and build up + background on AMSAT-DL / QO100 + I am doing some live QSOs .
The following paragaphs outline my specific station design
Requirements:
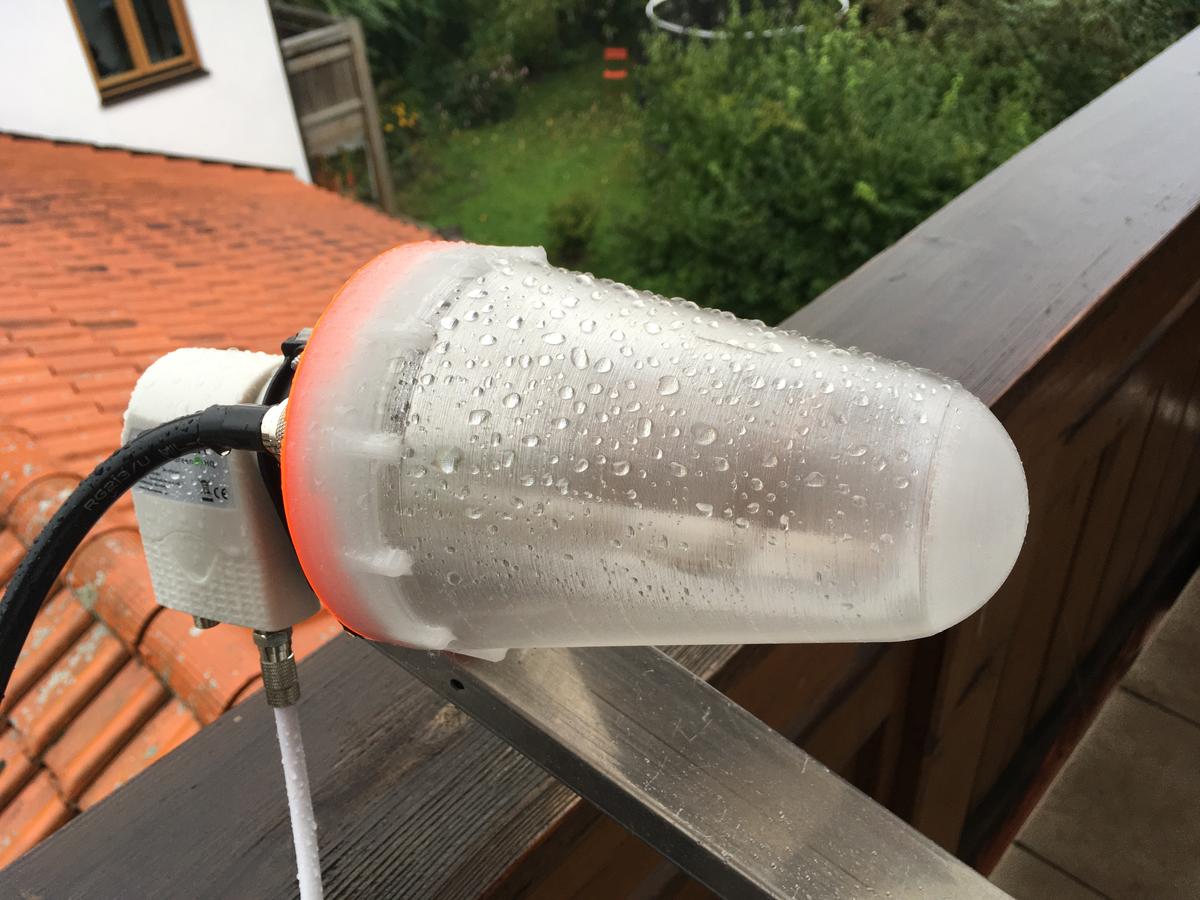
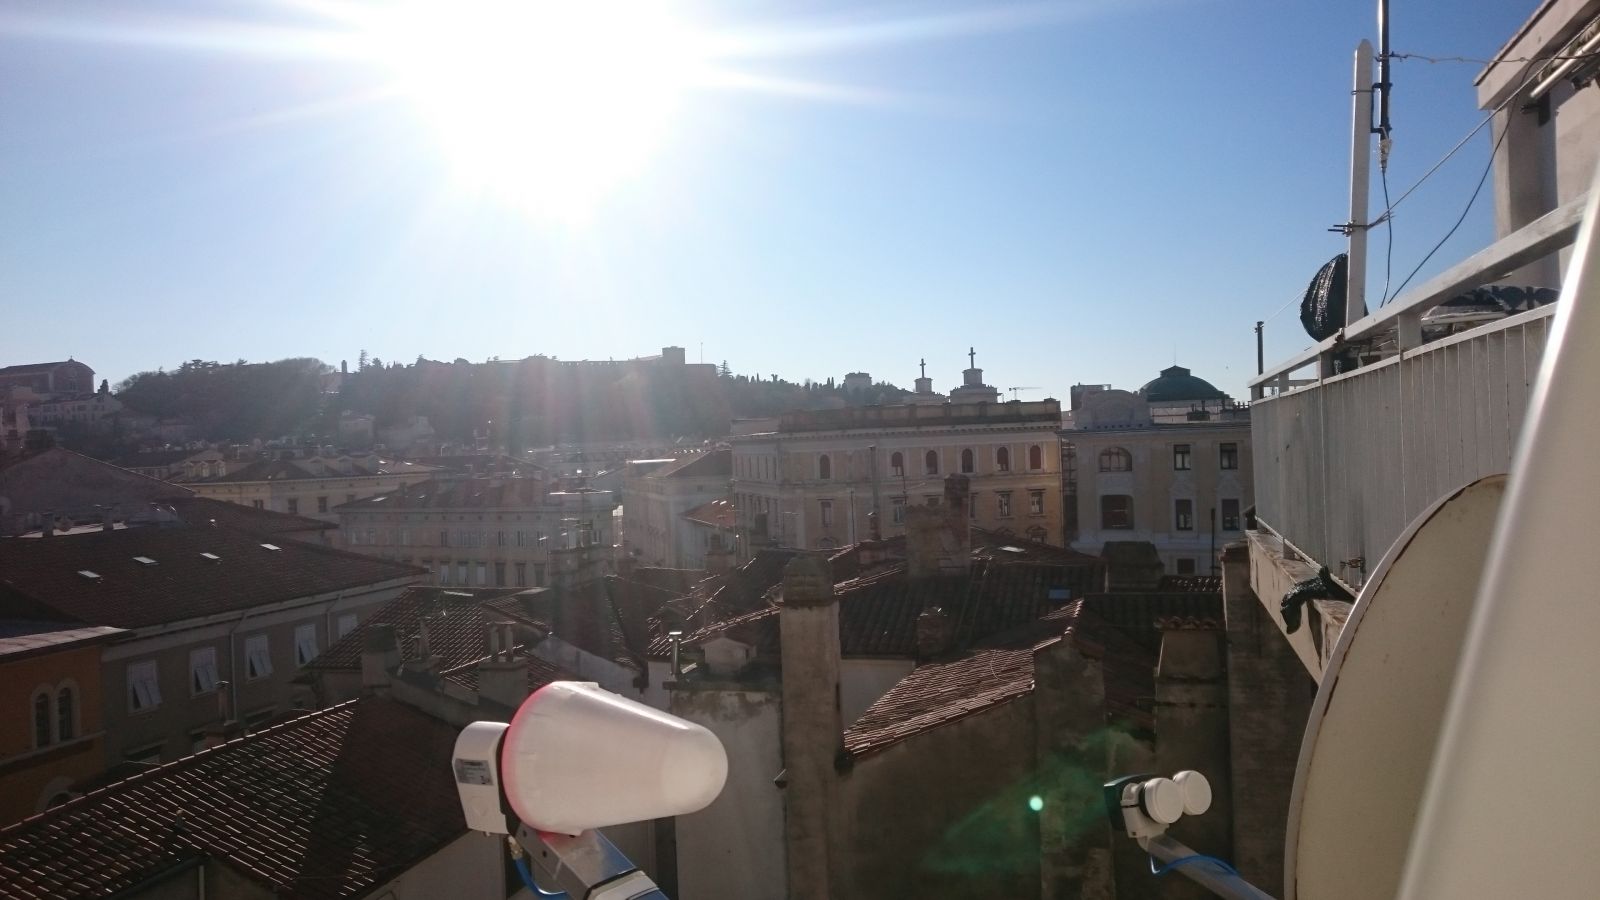
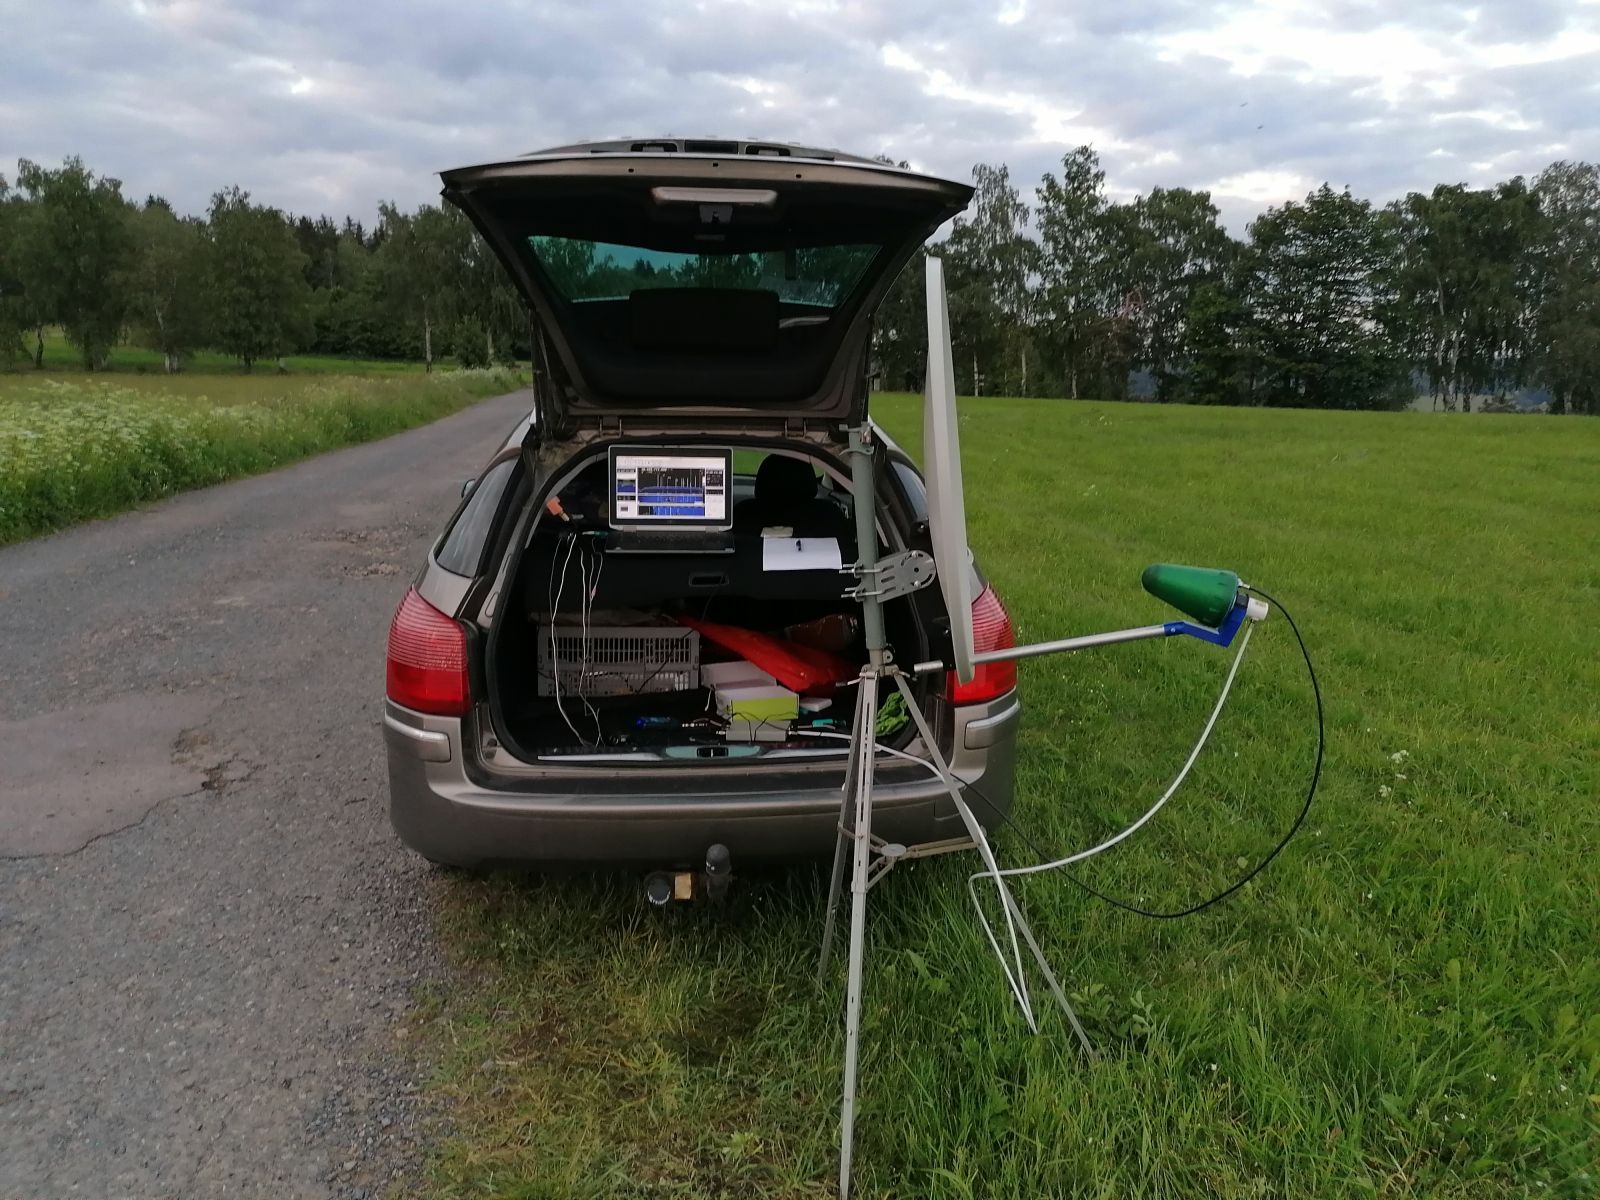
* Portable design -> shall be quickly deployable on my balcony or in the field
* Proven concept -> shall be derived from existing concepts, want to be become QRV quickly, experiments come later
* Simple setup -> single dish
Design:
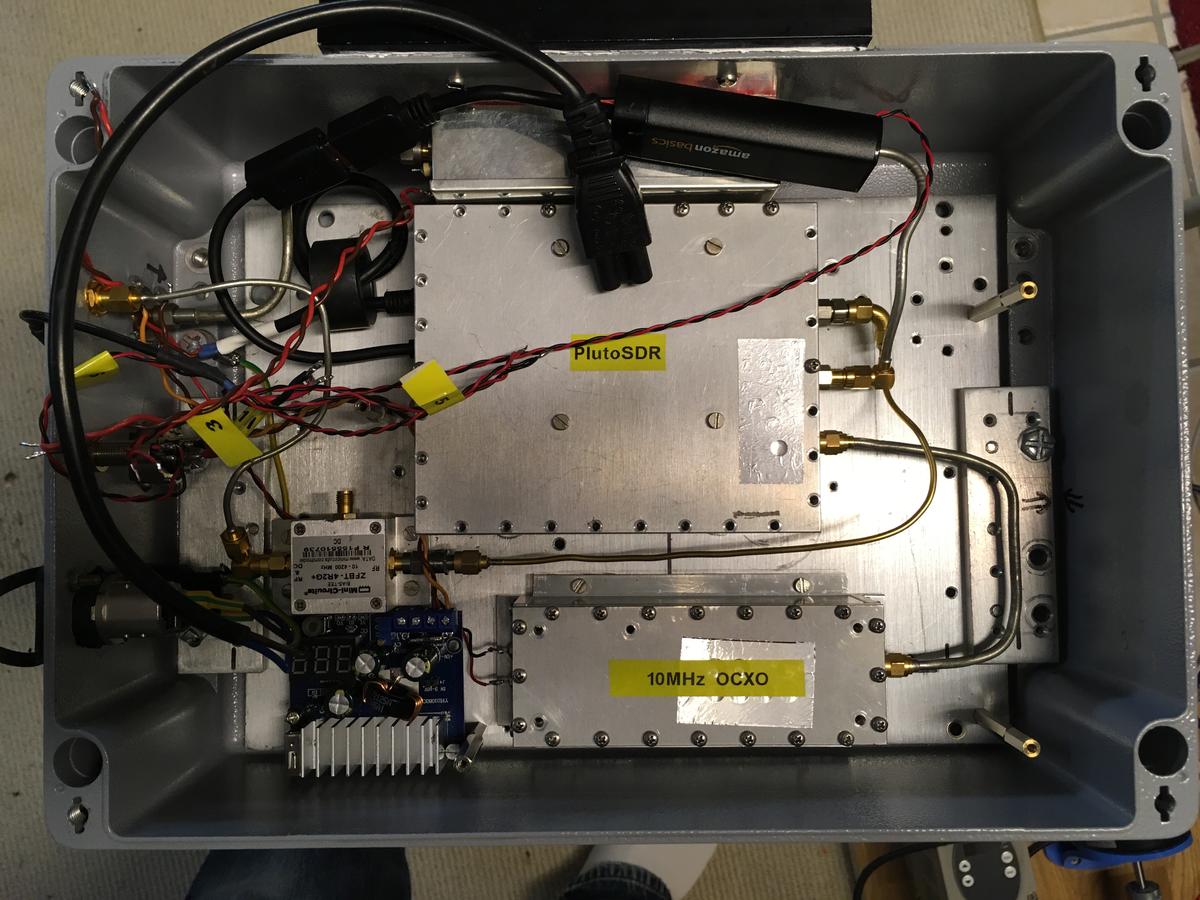
* All QO-100 relevant elements mounted in ruggedized box
* LNB frequency compensation via SDR console
* Passive thermal management
* 230VAC or 12-24VDC supply
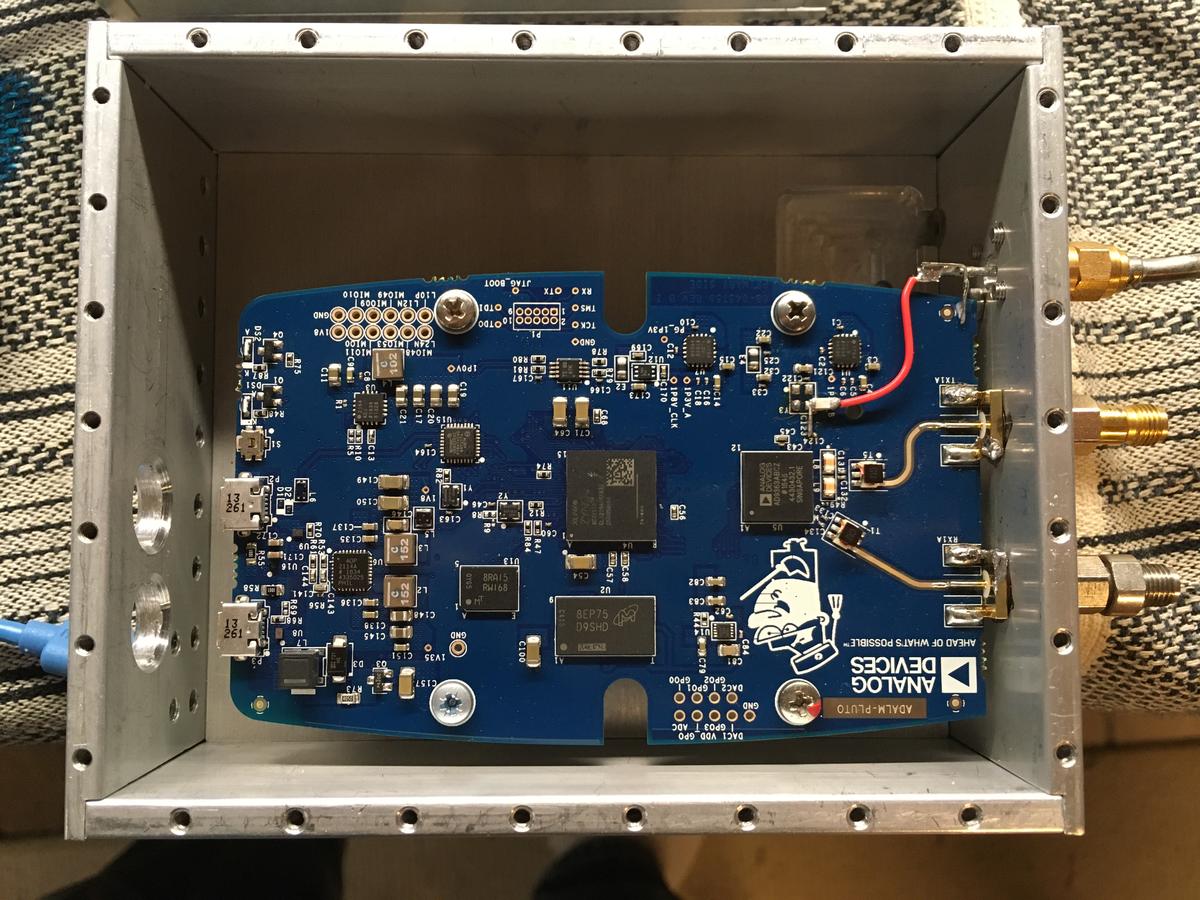
Pluto housing + external OSC input
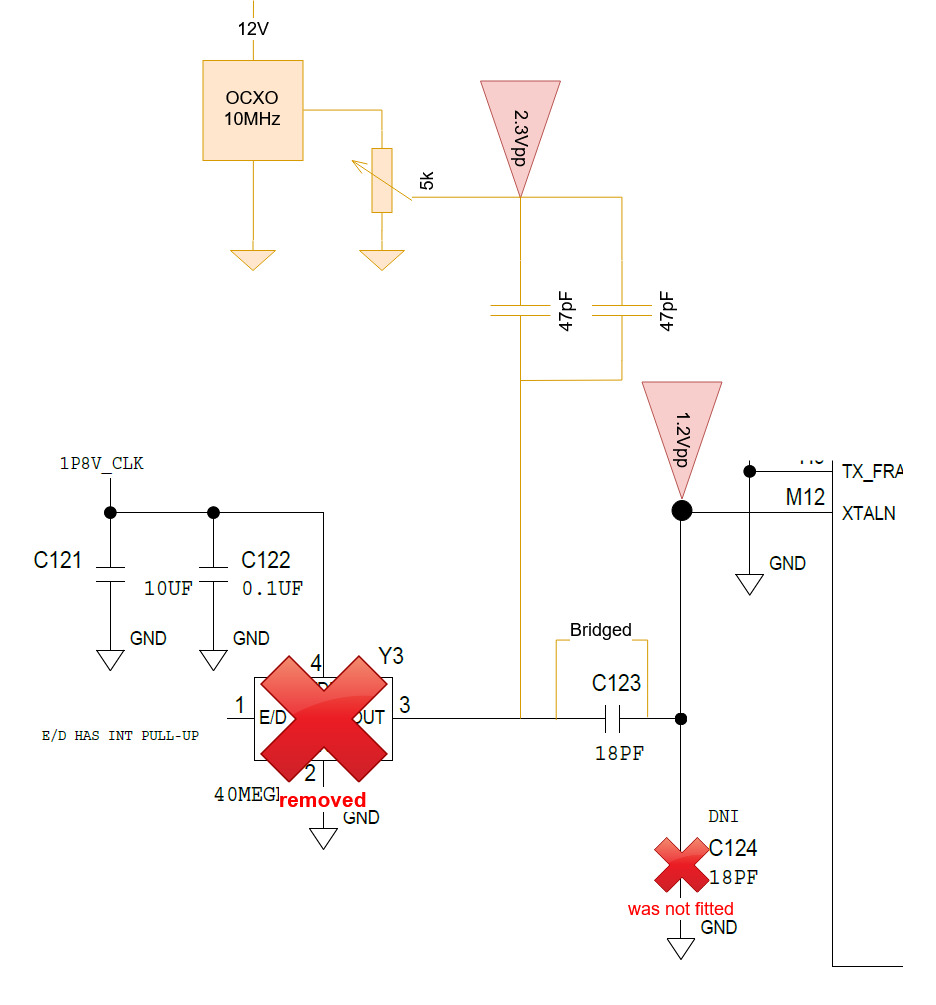
I am feeding an external 10MHz signal to the Pluto. This is the lower end of the accepted frequency range. It requires to replace the on board 18pF coupling capacitor. As C123 is tiny I simply bridged it and added 2x47pF in series. This will then pass enough signal to achieve the specified 1.3Vpp to the tranceiver chip.
RF section
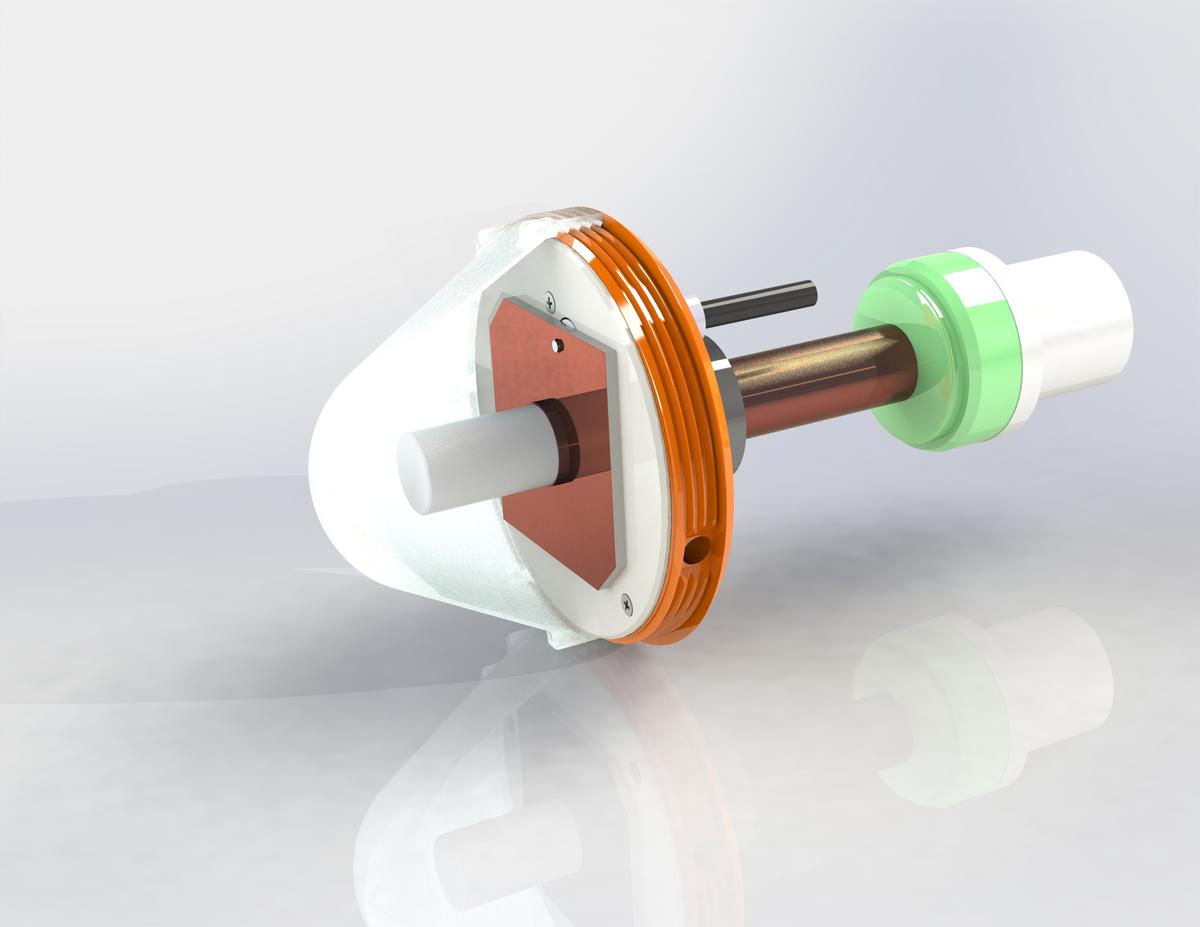
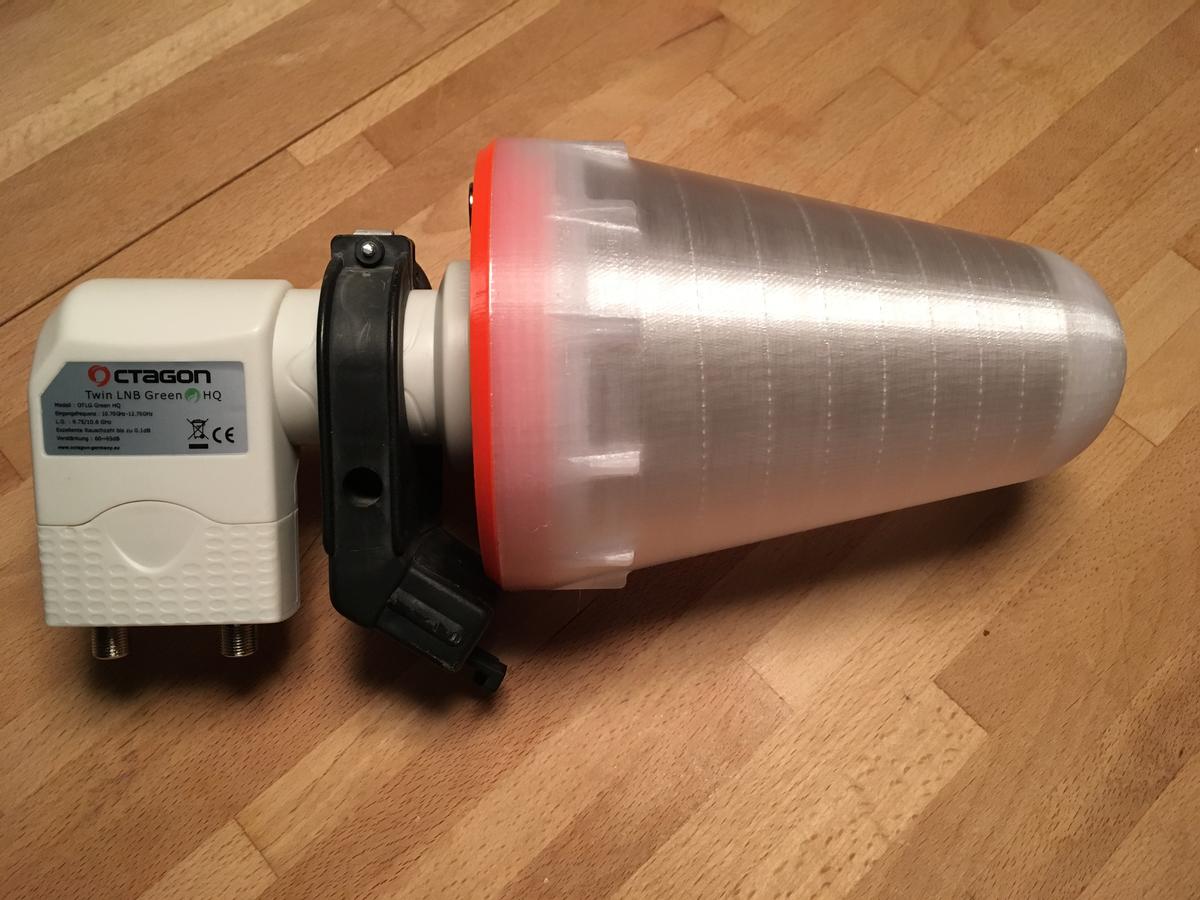
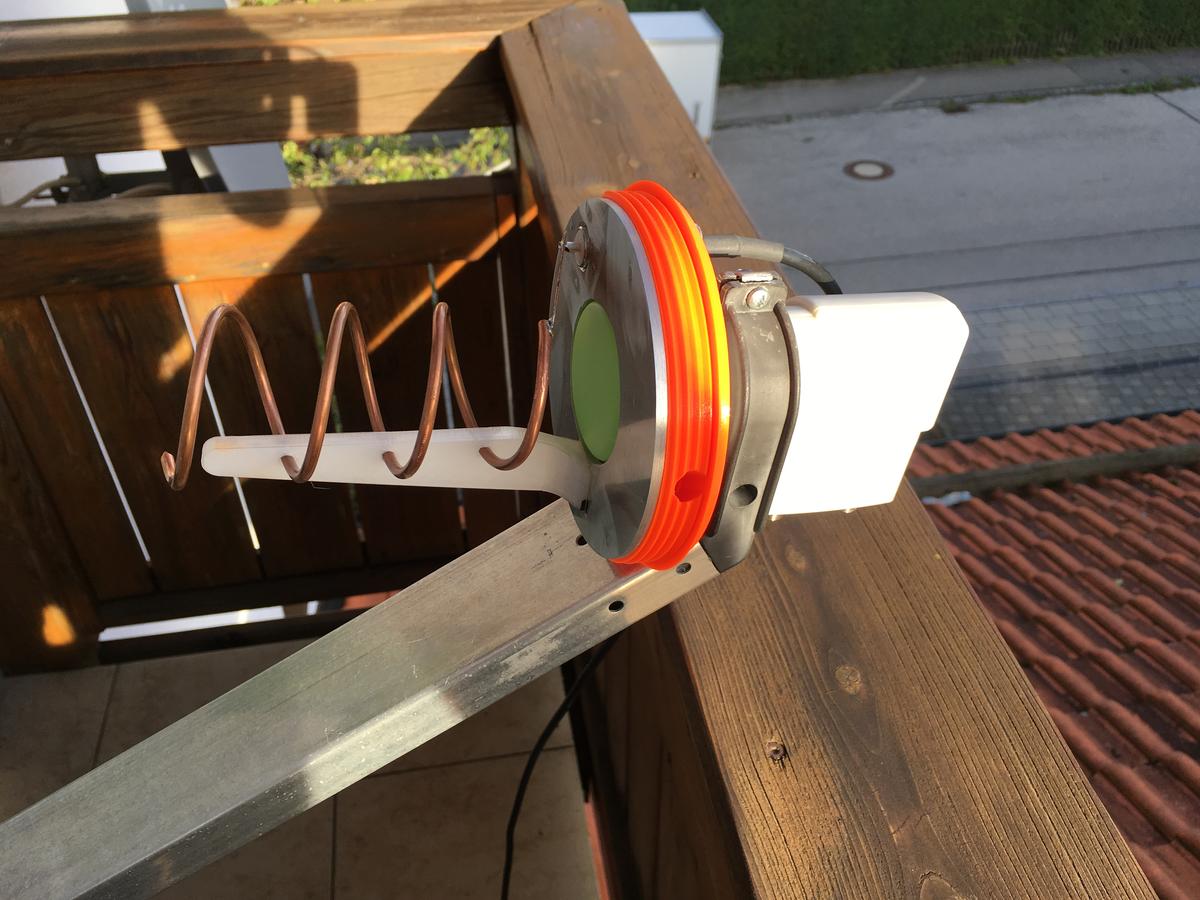
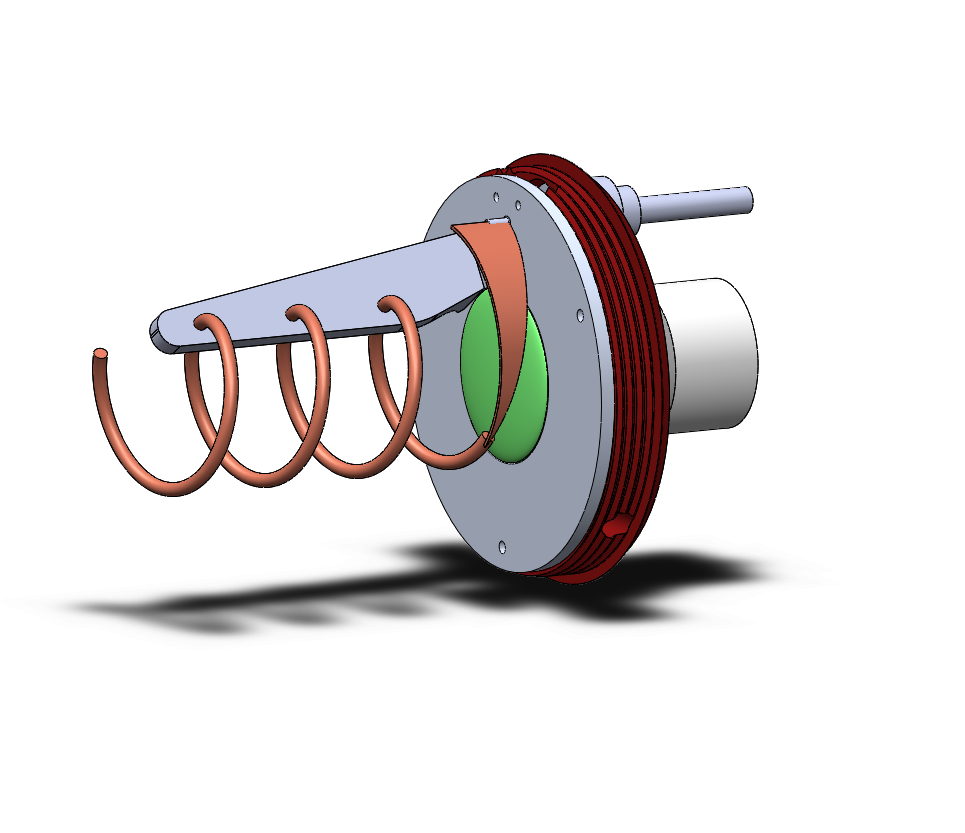
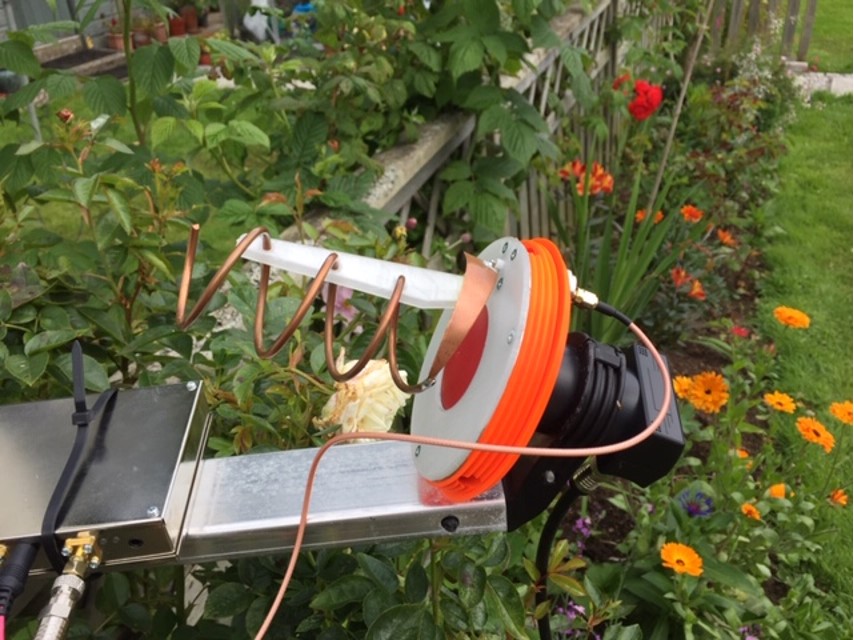
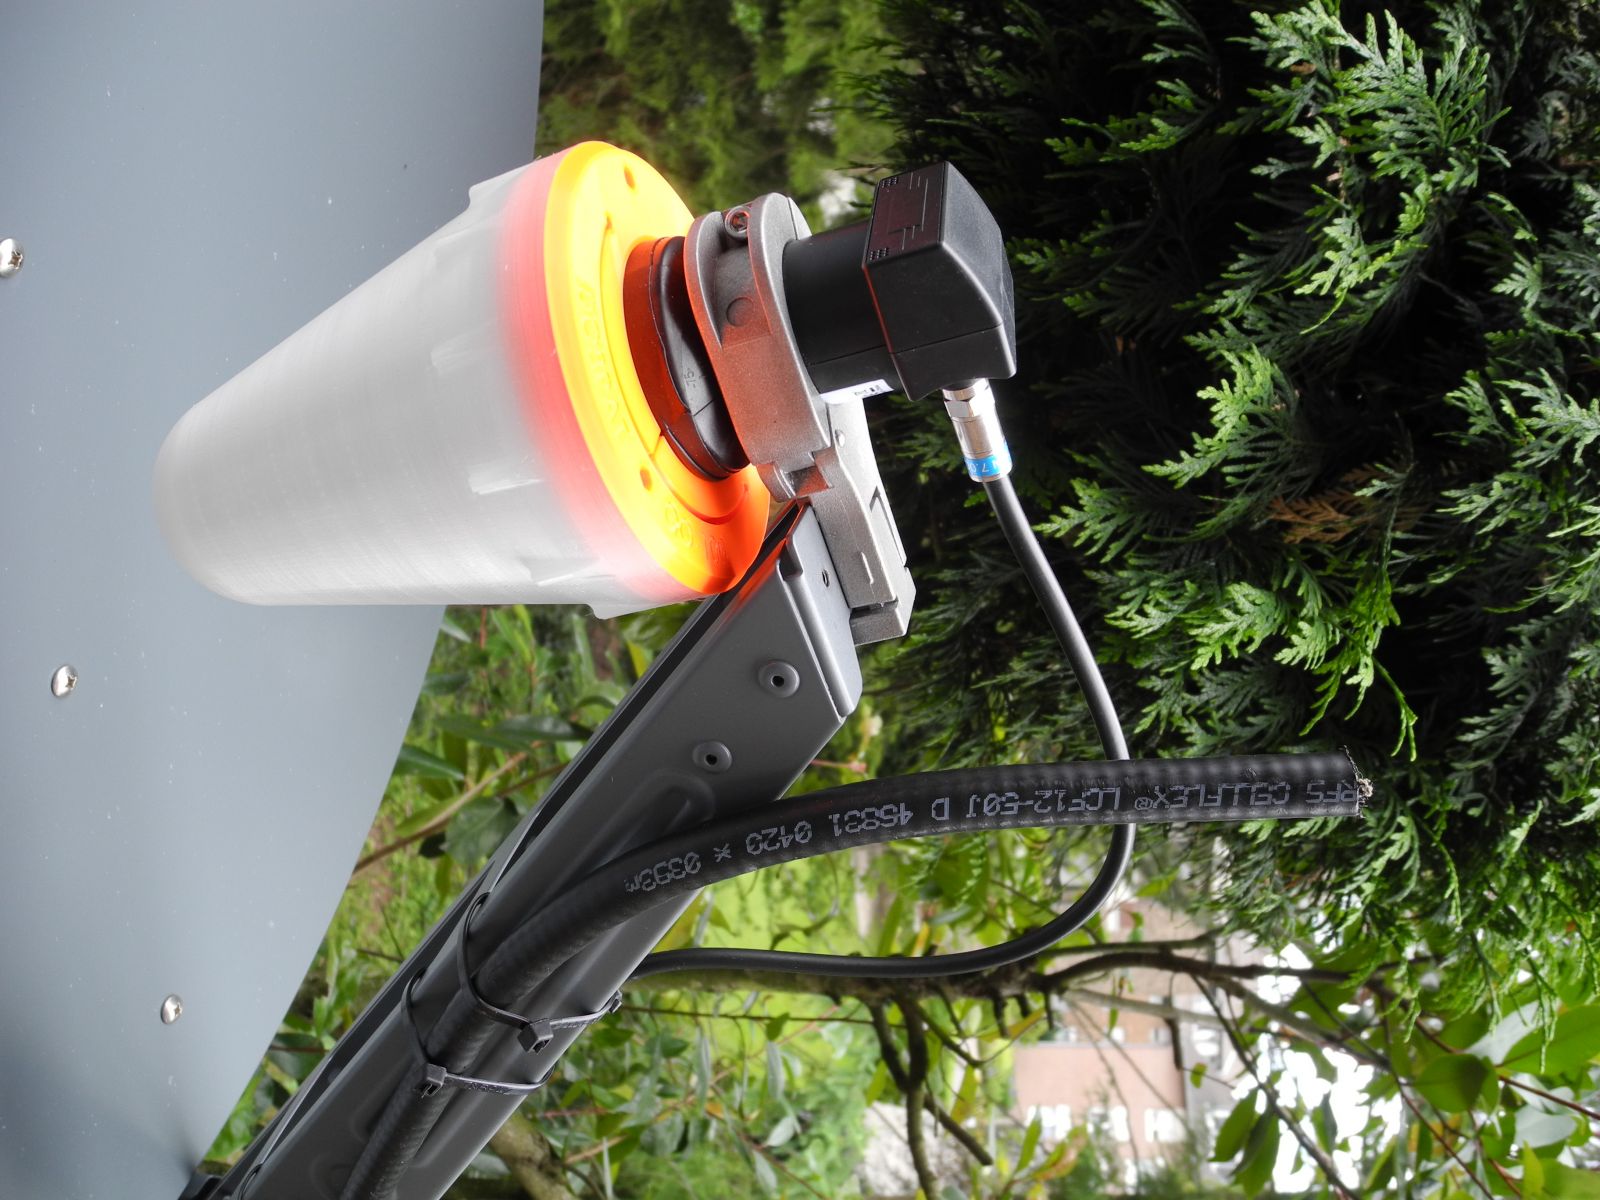
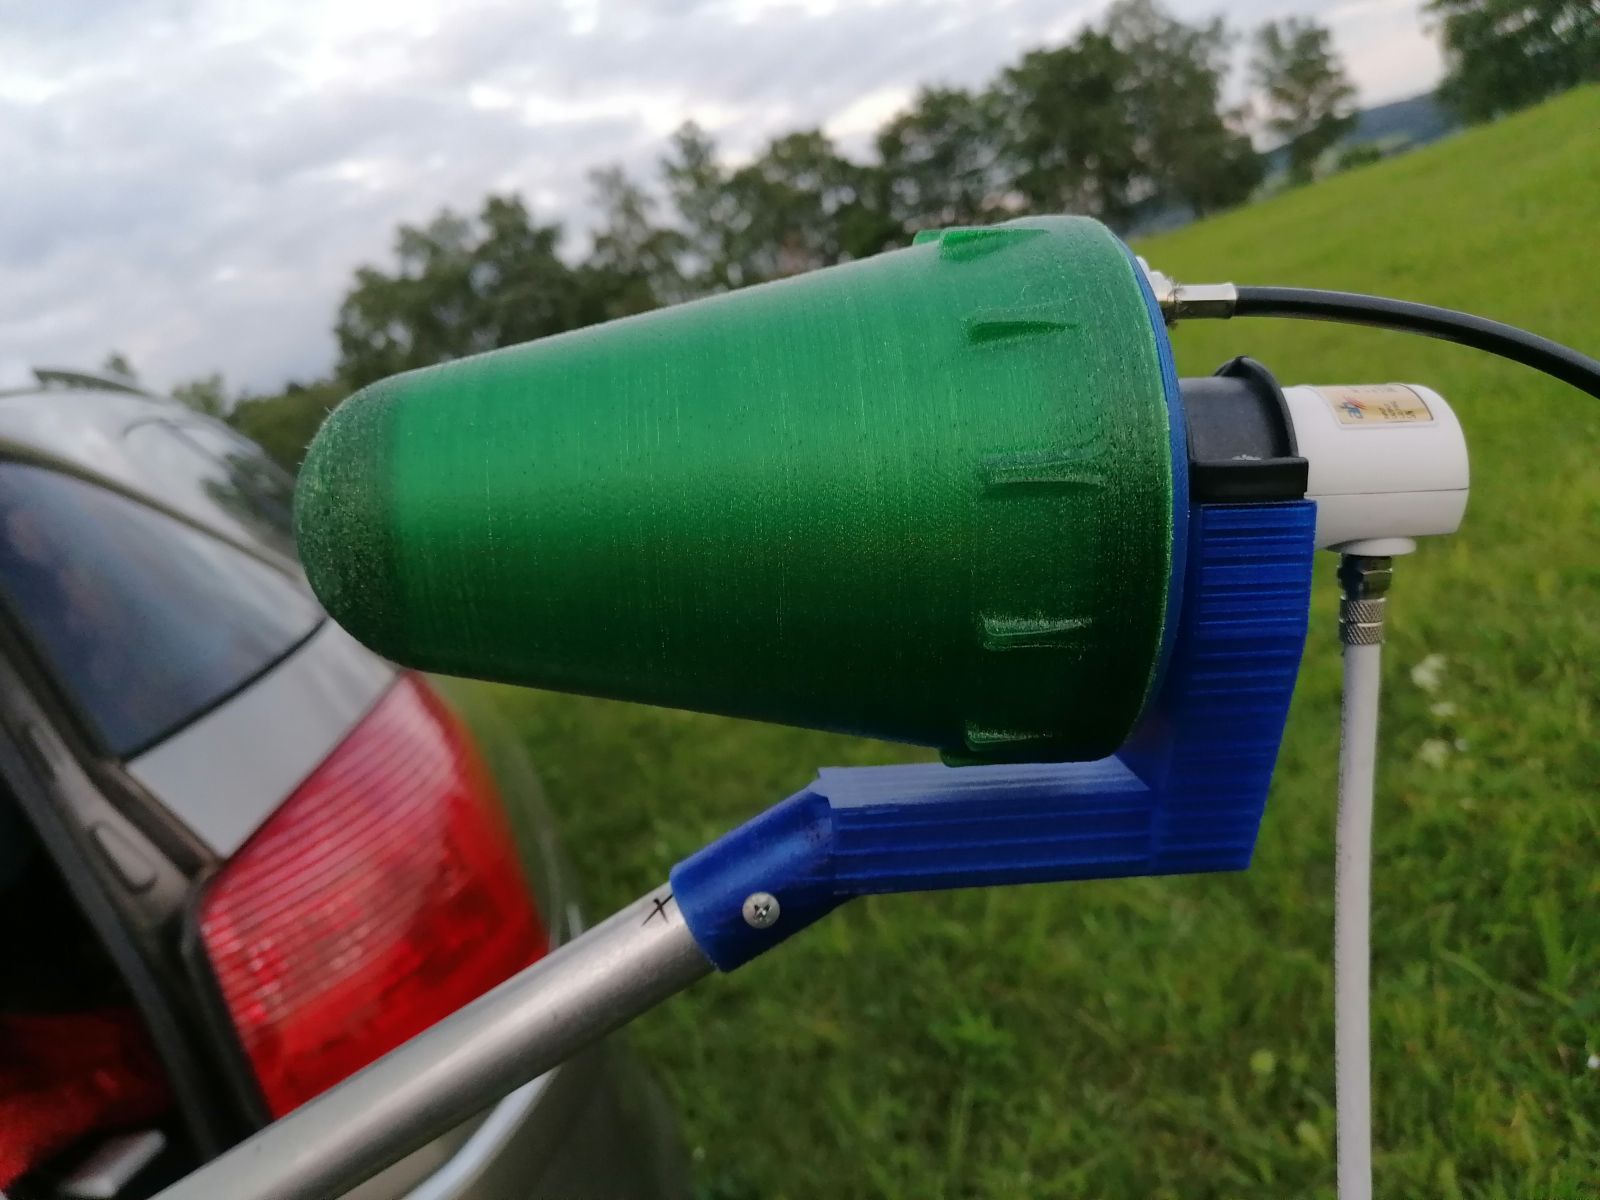
I am running the QO100 uplink via a DIY dual feed also known as "Ice Cone Feed" featuring a 3.5 turn helix and a standard unmodified LNB (55mm diameter).
If you have access to a 3D printer you can build it yourself. Or contact me via email and I can build a unit for you (see Ice Cone Feed v2).

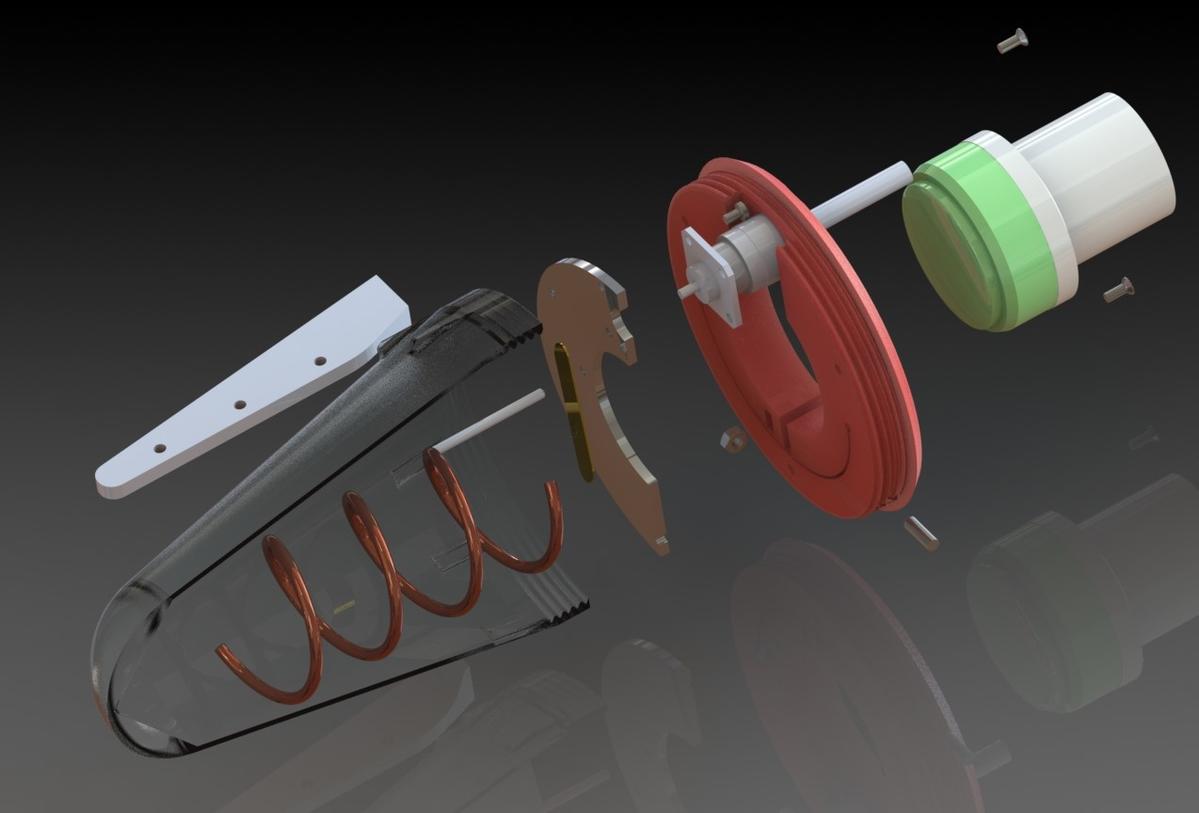
CONSTRUCTION: The Ice Cone Feed consists of 3D printable parts, which can be downloaded from thingiverse (links below).
All part should be printed in PET/PETG as this is UV resistant and won't warp at outside temperatures as PLA would.
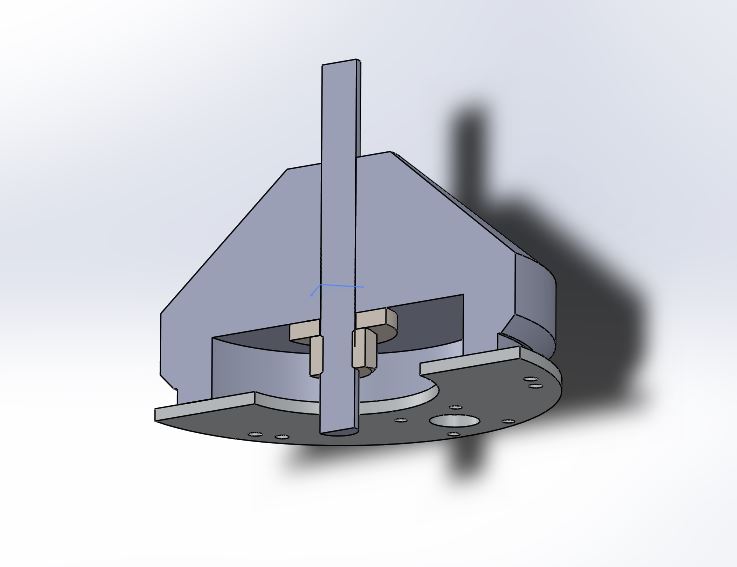
The reflector support (below in red) will be pushed onto the LNB horn. It is designed for a standard 55mm horn diameter (59/61mm versions available as well). Print with 5-10% infill. It is secured by a clamping mechanism. An M4 bolt is inserted sideways and locks an M4 nut. Tighten the M4 bolt for clamping.
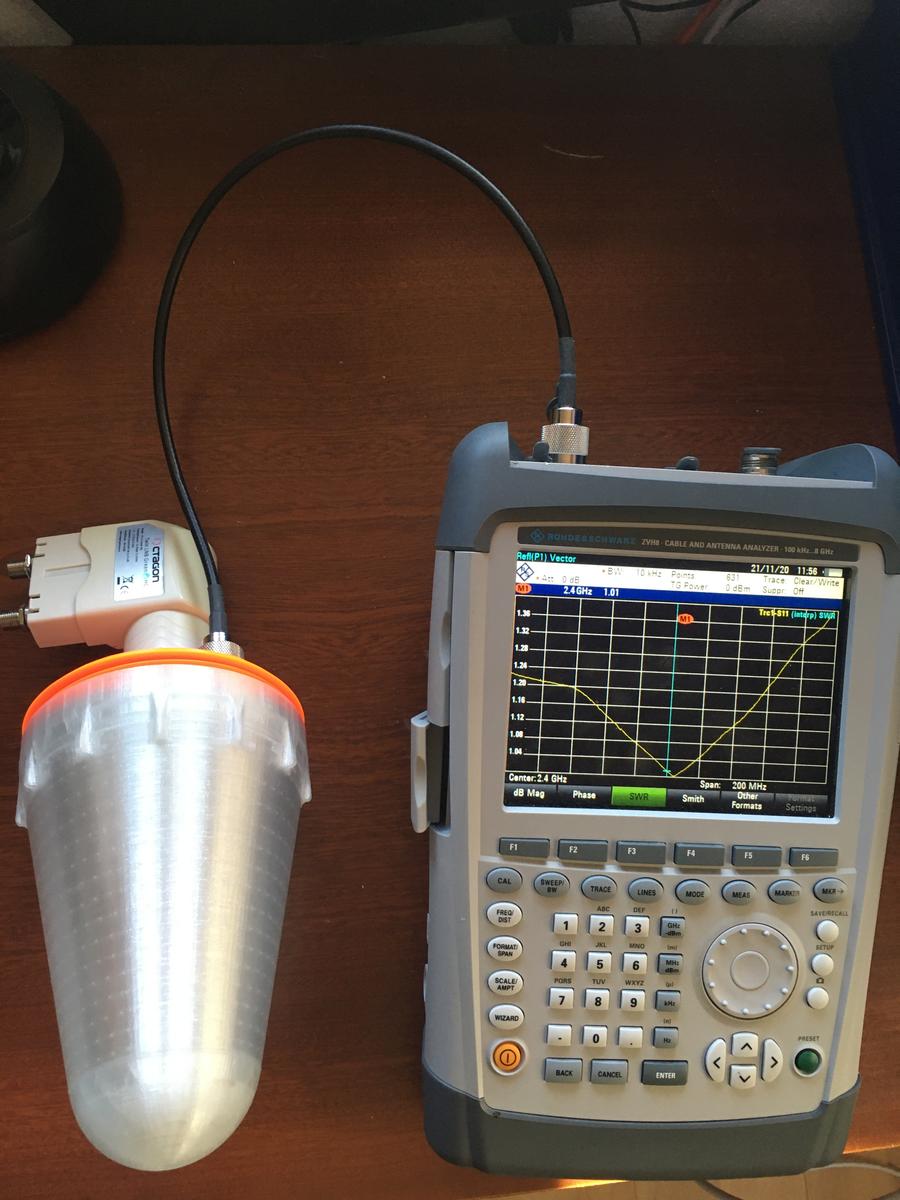
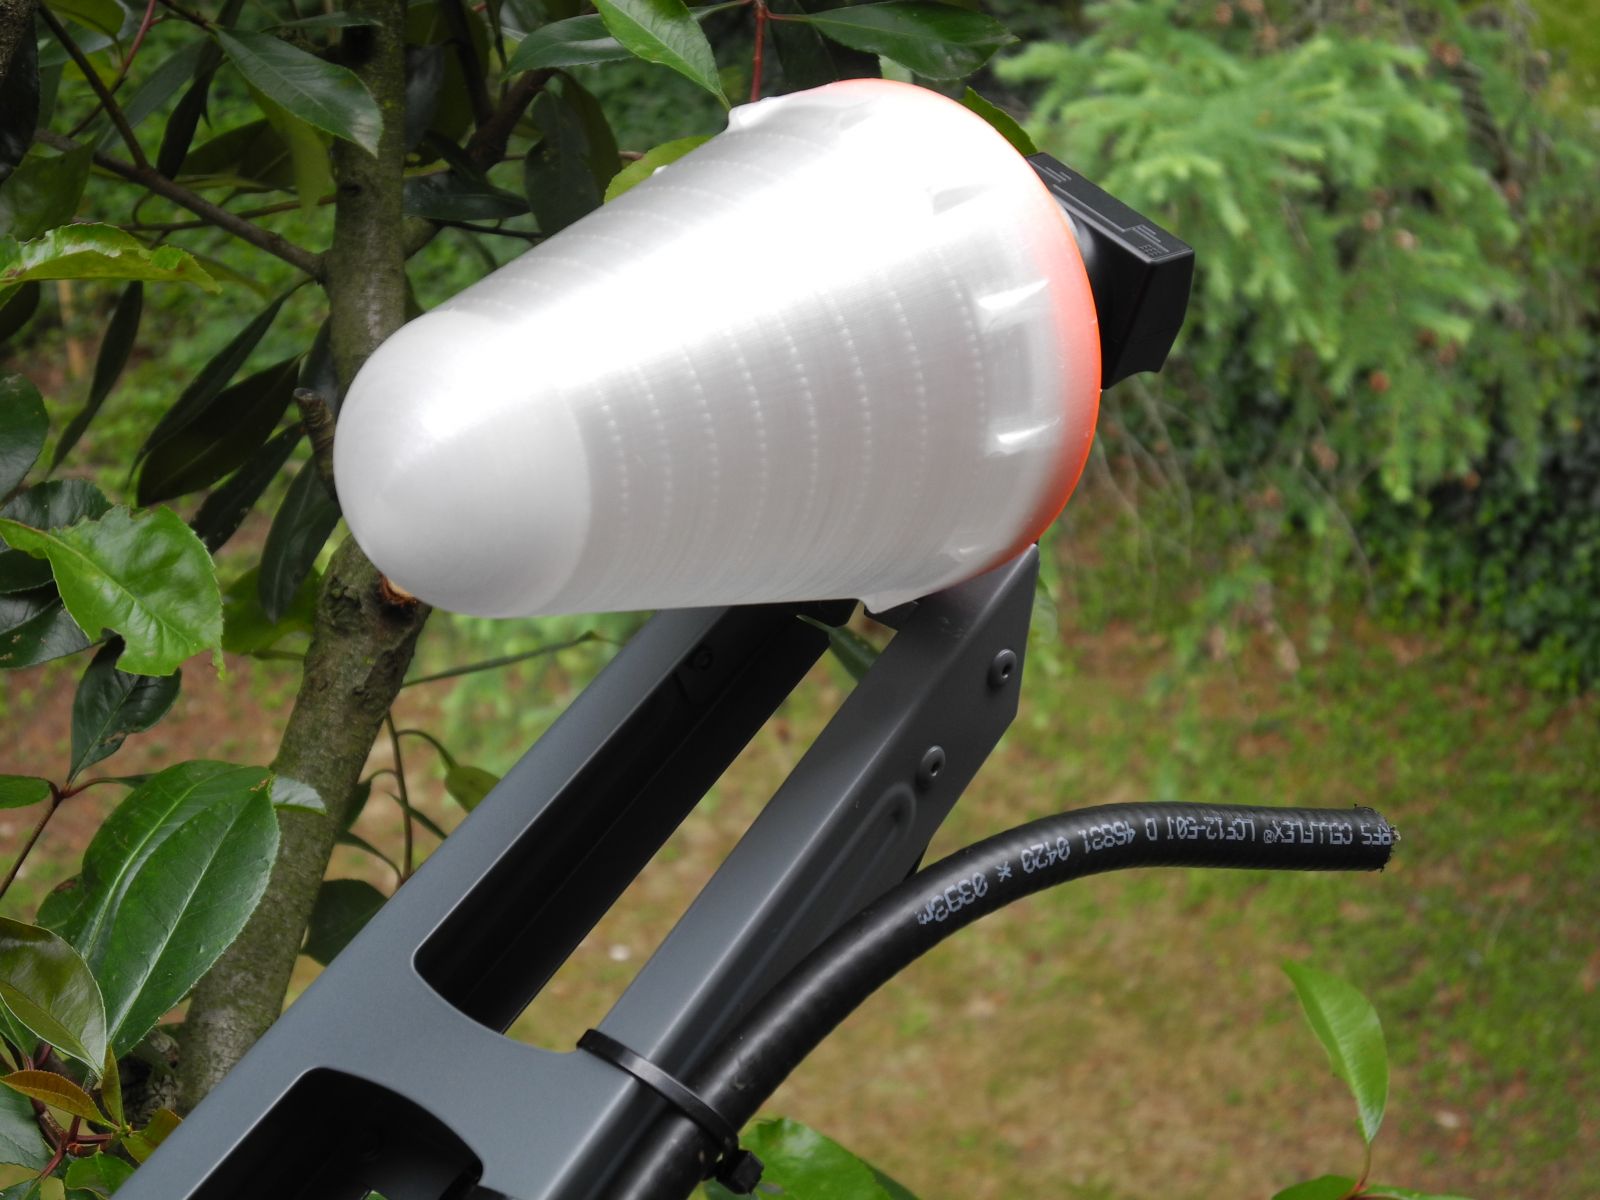
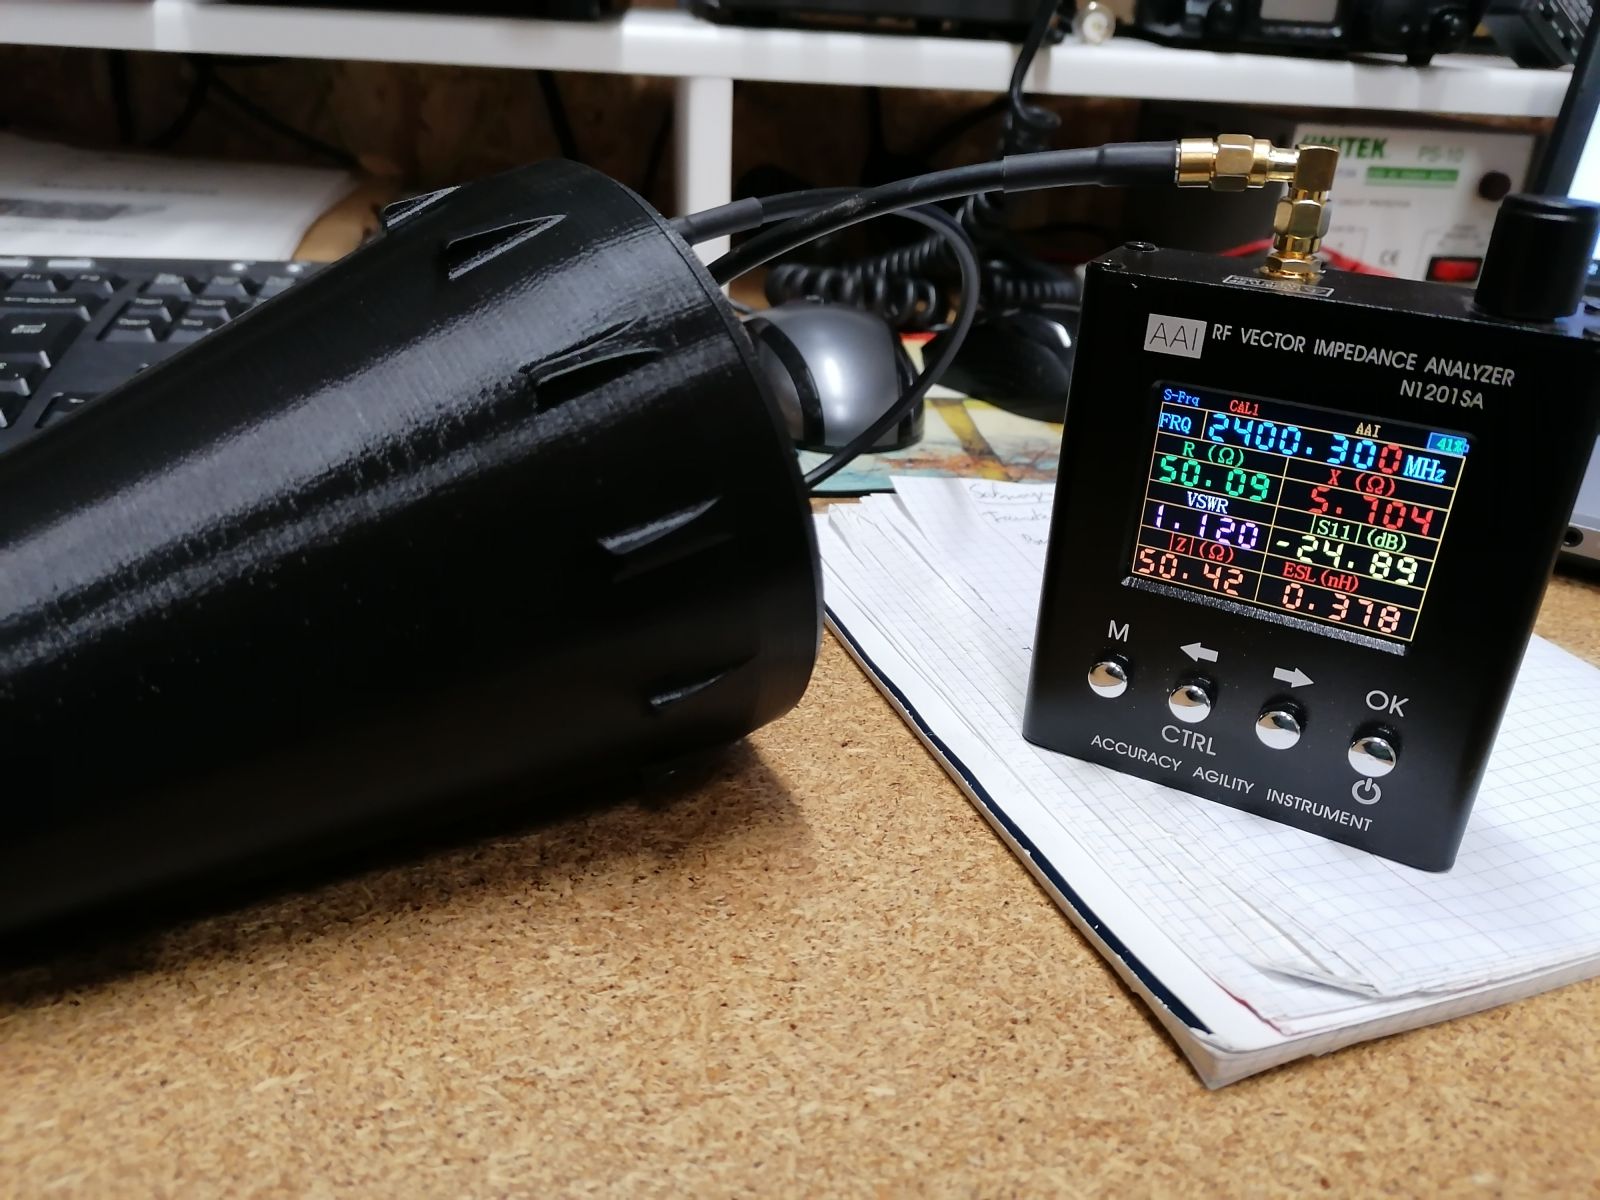
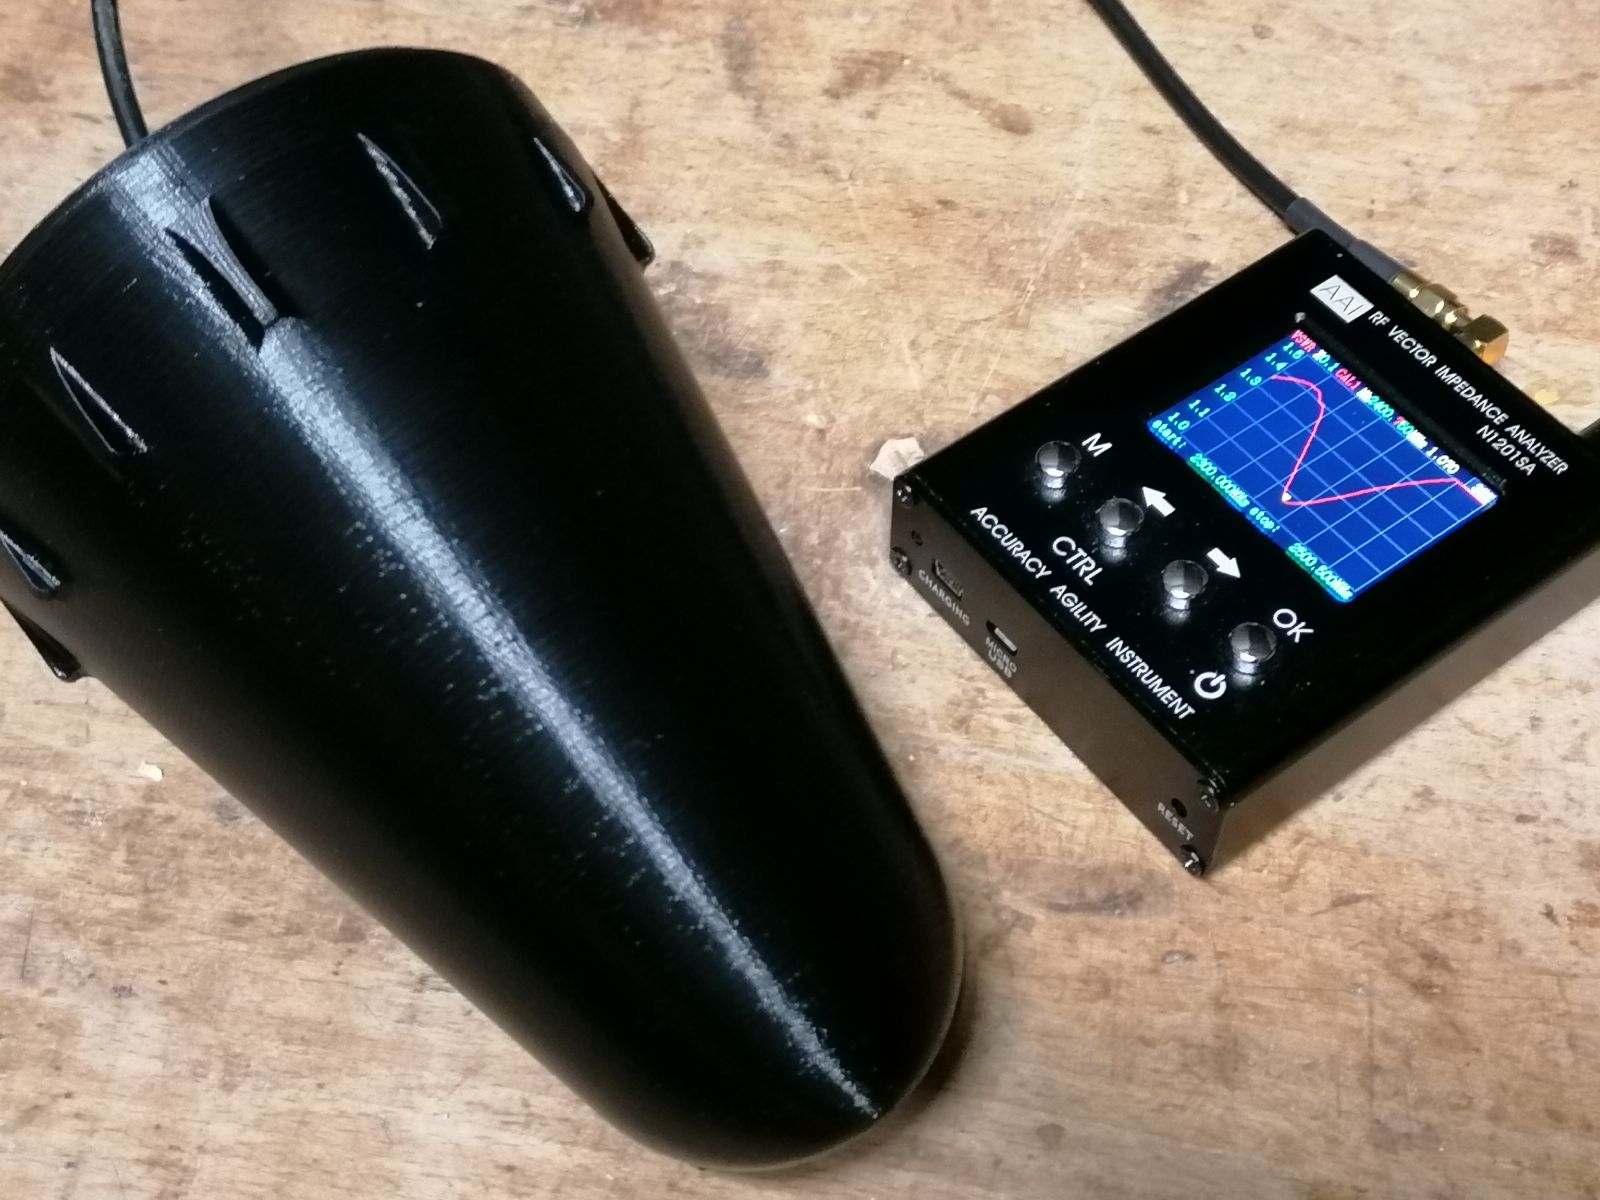
The cover is a cone with 2mm wall thickness. Print with 100% infill. A rough qualitative test did not show significant attenuation at 2.4 GHz:
https://twitter.com/i/status/1185990040159170561
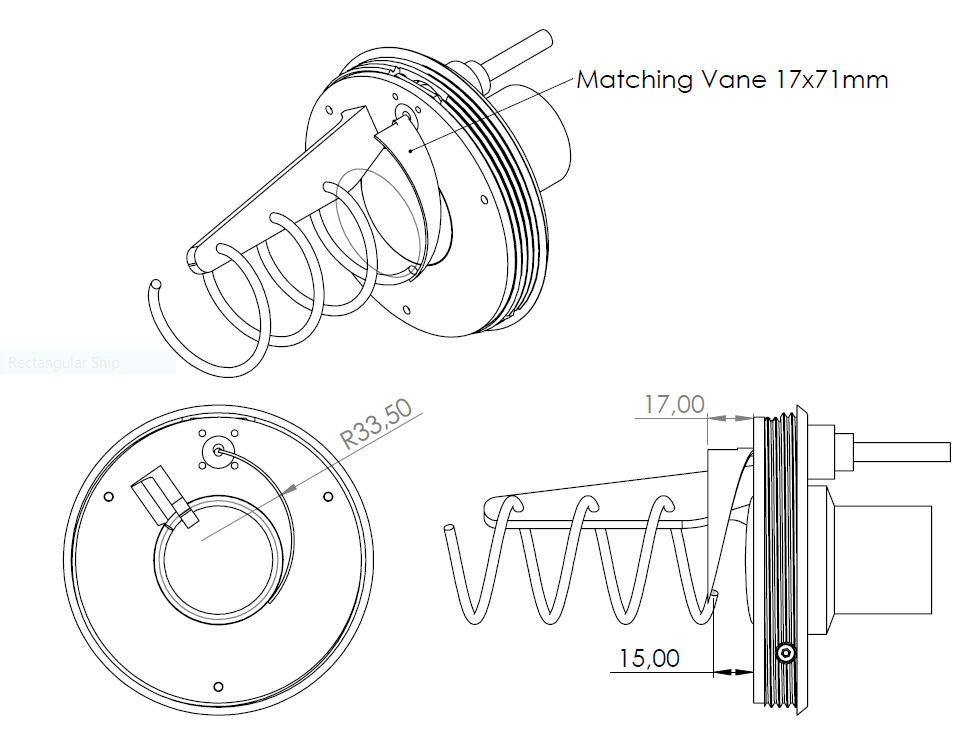
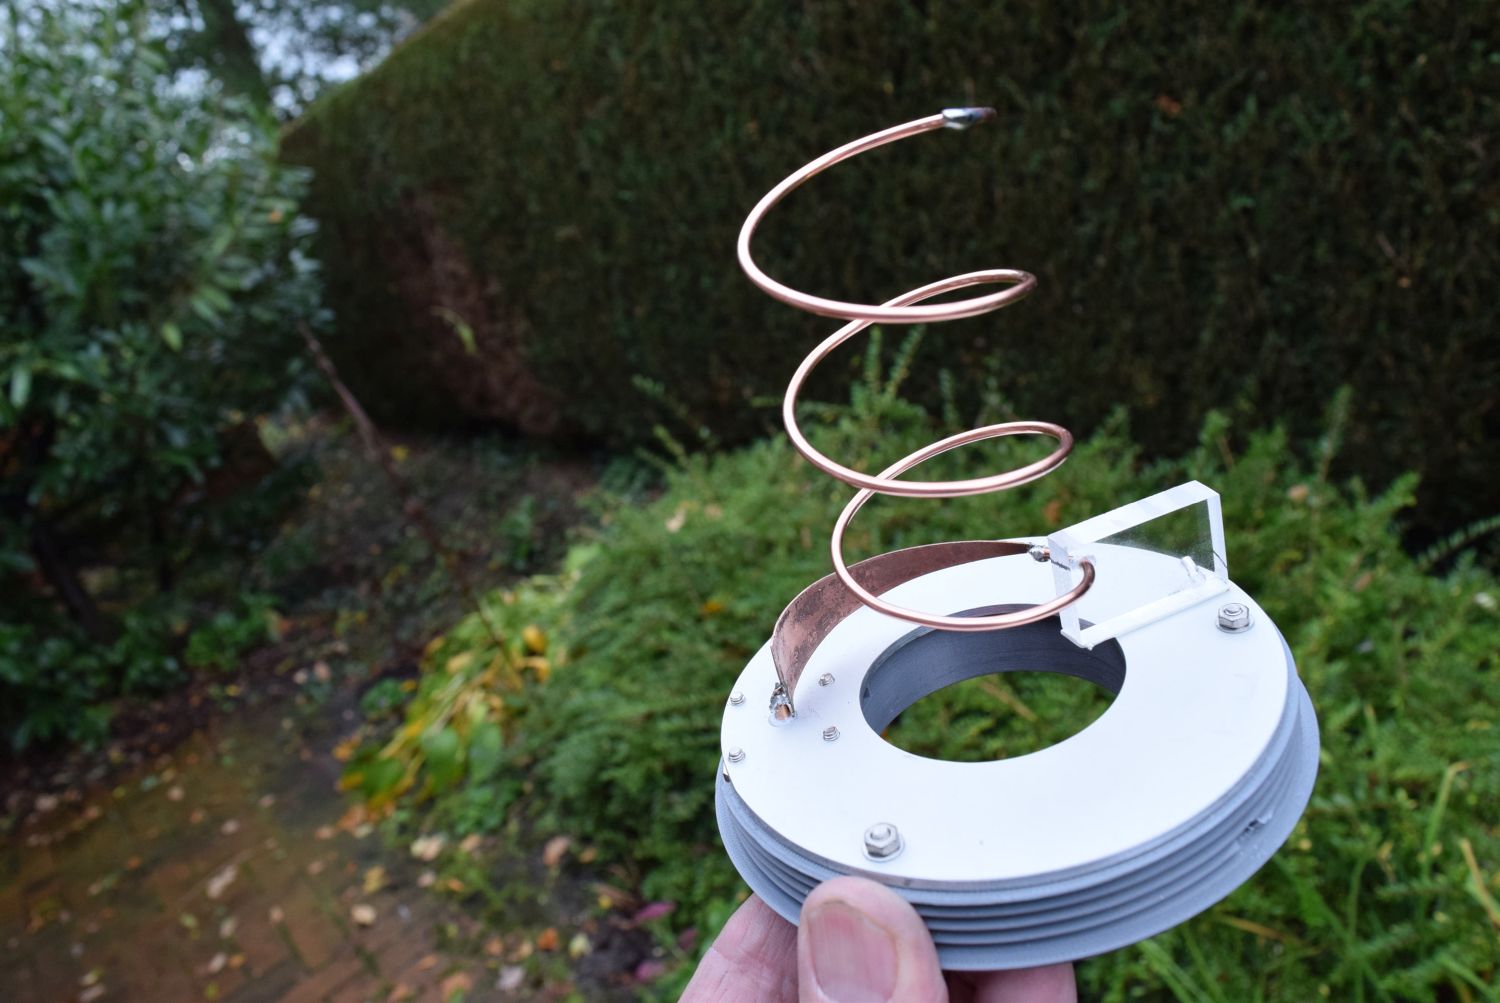
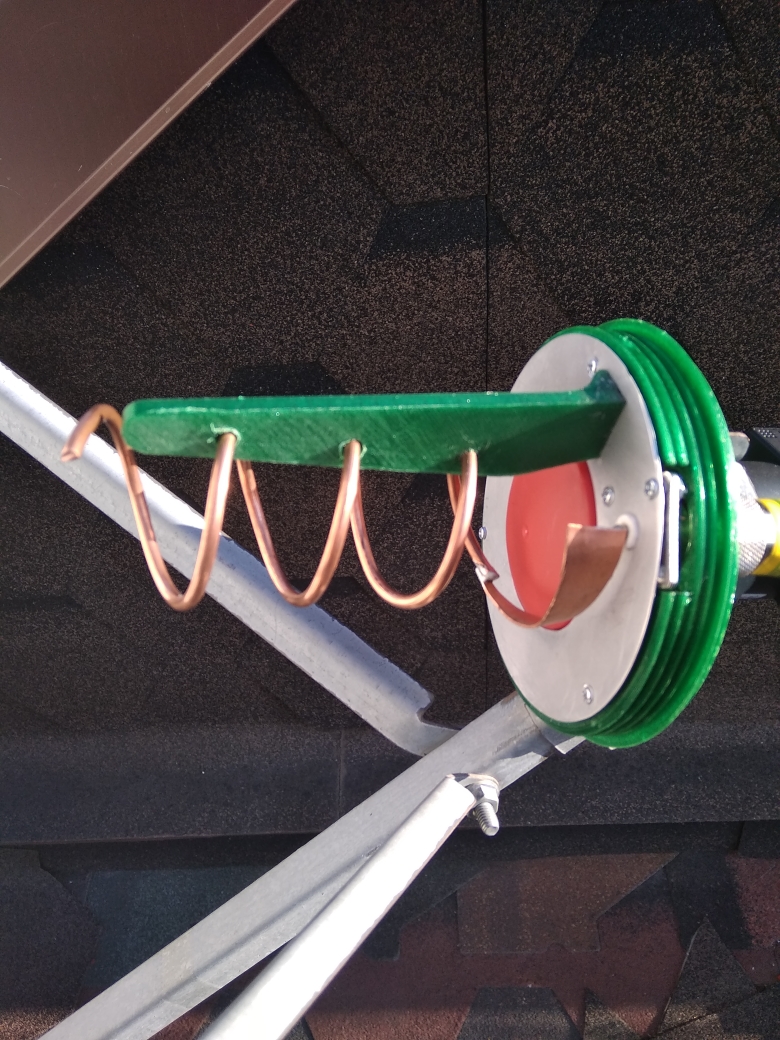
The reflector is a 4mm aluminum disk, see drawing and hole pattern below Cut M4 threads for 3 bolts to secure the reflector to its support. Cut M3 threads for the N type connector. Make sure you meet the outer diameter, if the reflector is too large then the cover will get stuck when srewing it on. I don't have a lathe to produce perfect disks. I made my reflector by rougly cutting as per below drawing (a bit oversize). Then I used a special 3D printed tool (also on thingiverse) which you can mount the reflector on (M10 bolt) and spin it on a standard column drill. Use an angle grinder to shape the reflector circular. Works like a charme, demonstrated by this gentleman: https://twitter.com/i/status/1184072011787788288
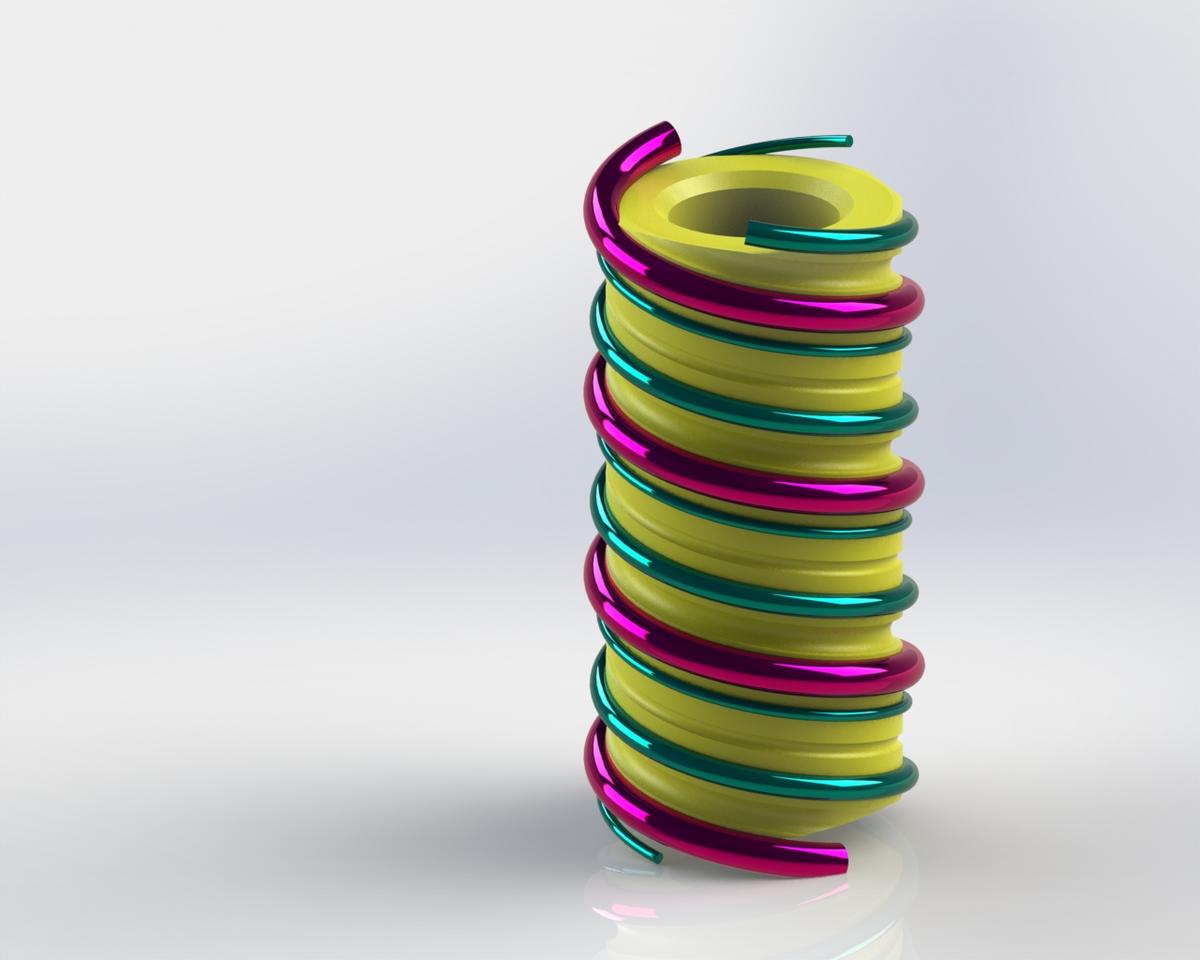
The helix consist of 10mm2 copper wire (although 16mm2 is probably better, let me know about your experiences). To help with winding a special winding tool can be printed as well. Just wind along the outer groove of the cylinder, 3.5 turns and you get a helix to spec with quite good tolerances.
The antenna is fed by a standard N-type connector.
Once the helix is finished use the helix support bracket and wind the helix into it. The bracket can be glued onto the reflector.
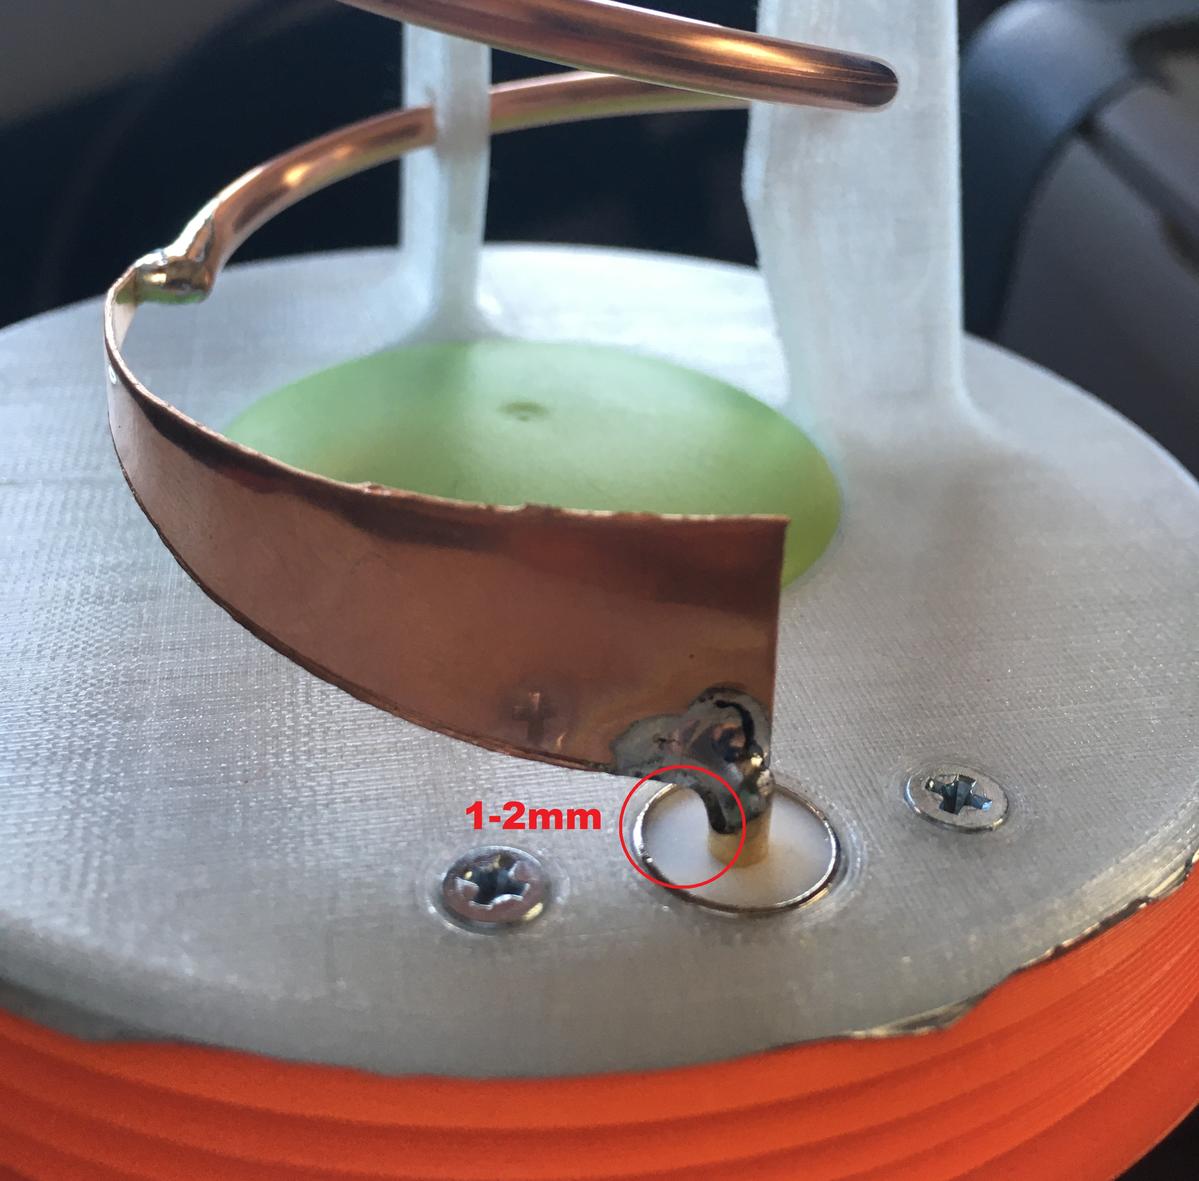
MATCHING: I have changed the matching strip to a vane style type. Cut a .5mm copper vane as per the dimensions below. Rotate the helix such that the end is 15mm away from the reflector.
TUNING: One way to tune the resonance to 2.4 GHz is to adjust the gap between vane and reflector at the connector side. For the Ice Cone Feed v2 the sweet spot is around 1 - 2mm. Other methods are adding copper tuning elements and chopping off bits until reaching resonance. Let me know about your experiences.
DISCLAIMER: This is an open source design for the HAM community. As such it is licensed under the Creative Commons - Attribution - Non-Commercial - No Derivatives license. You are welcome to rebuild it and use it for free for private HAM activity but you must not sell or monitarize it. Contact me for a commercial license.
DOWNLOADS: All STL files for 3D printing + pdfs and dxf for reflector hole pattern are packaged here: https://www.thingiverse.com/thing:3899461

Helix winder for different wire diameters
Lathing tool
This is an improved version for series production.
If you are not comfortable to build one yourself or do not have the right tools please contact me for a purchase.
Please note: The Ice Cone Feed v2 comes fully assembled and tuned to 2.4GHz. It is plug and play for QO100 stations. Let me know your LNB type and diameter so that I can choose the right adapter.
Click below for the datasheet:

 |
 |
 |
 |
 |
 |
 |
 |
 |
 |
 |
 |
 |
|
|
 |
 |
 |
A new design I am working on is a 3D printable patch antenna in a similar configuration as the famous POTY antenna. The design is mostly 3D printed, the radiator and reflector consist of copper and aluminum foil. The wave guide is a standard copper pipe.
Many design elements are taken over from the Ice Cone Feed such as the thread on radom. The patch itself should be robust against mechanical detuning as it is a rigid printed block.
Work in progress...